
Hey everyone!
Selfies are all the rage these days. When you pose for a picture, do you smile with your teeth showing or with your mouth closed? I personally use Snapchat so much that it really depends on the filter I’m using. But, for most pictures I generally like to go for a toothy grin, as a closed-mouth smile can sometimes come off looking a bit forced and constipated. Which is your go-to way of smiling?
Do you like showing your teeth when you smile in photos, or in general? Because…
It’s getting to be that time of year again when we relax a bit on our healthy diet rules, and indulge more on rich, warm foods. Coffee, hot chocolate, chai lattes, apple pie, maple pecan bars, pumpkin pie… I don’t know, I’m starting to ramble on food now. Point is, all this food will scare your dentist the next time you go in for a cleaning. Because, to be honest, how often do you guys actually brush your teeth, or even just drink some clear water after eating these teeth-staining goodies?
(Okay, I do, but it’s because I can get pretty anal about preventing cavities and tooth decay and yellowing. But anyways…)
Would you guys like to know how to get whiter teeth? I hope the answer is yes, otherwise I will assume you like a set resembling candy corn rather than pearly whites.
Today, I wanted to share with you all a way to rid your teeth of those disgusting stains and discolorations through a home teeth whitening kit by Smile Brilliant. This will help remove stains from your teeth using a professional teeth whitening kit! But you don’t have to actually get dressed and go to the dentist. You can do it at home in your pajamas with Netflix running in the background. Such a great option for lazy hermits like me.
Smile Brilliant kindly offered to send me a kit to try out and review! I actually had one of my good friends try it out because she can be pretty brutally honest when it comes to her likes and dislikes. It was quite fun doing this little project with my friend because it gave her a second opinion on whether or not this product actually made a difference. It can be hard to tell if your teeth actually got whiter if you are staring at your teeth every day. Unlike other at home teeth-whitening products, you can get these custom-fit trays for your teeth with the Smile Brilliant teeth whitening kit. My friend has complained in the past about her crooked teeth, as she still hasn’t gotten braces yet. So having her try out this product definitely gave me a better idea of how this product was.
Okay, as all beauty gurus on YouTube say “Let’s get into it!”
Ugh that was so cringe-worthy. Forget I said that.
 |
| Photo of all the stuff the kit includes |
When she first received the kit, she had to create a dental impression of her teeth. It was really easy to do. There’s really no way for you to mess it up. Unless you remove it from your mouth and then crush it with your foot, but why would you?
Anyways, after making the dental impressions, she sent it back to the company. They then made teeth whitening trays that fit her mouth perfectly, using the dental impressions to make them custom-fit. As I said before, her teeth aren’t perfectly positioned and straight, BUT with the whole dental impressions thing, this ensured that her teeth whitening trays actually fit her teeth!
The teeth whitening kit we got had four syringes each of whitening and desensitizing gel. What’s great about this kit is that it also works for people with sensitive teeth. The desensitizing gel actually came in really handy for most of the teeth whitening process. With every new product you try, there’s a chance that you will experience sensitivity. Different products use different ingredients, so it’s really great that Smile Brilliant took into account that a lot of people have sensitive teeth.
To use this kit, all she had to do was apply the desensitizing gel before using the whitening stuff. This helps prep her teeth for the whole thing. The directions that came with the kit were very clear and easy to follow. It wasn’t too difficult for her to do the whole process.
When it comes to using the whitening product, you apply it on the tray, and you keep it in for 1-3 hours. 3 hours. It sounds crazy but that’s actually how long you can leave it in for. Then you follow that up with the desensitizing gel for about a half hour.
The kit came with enough for about 18-24 treatments. It comes with that much so that you can do it consistently for a couple weeks. With 6 syringes it has enough for 18-24 because each syringe is good for about 3-4 sessions of whitening. It’s totally fine to skip a few days here and there, but the results will take a bit longer! With this teeth whitening kit, the treatments create a gradual whitening so that you don’t go blinding people with your unnaturally white teeth. It ends up with a more subtle transition to whiter teeth, that ends up looking more natural and flattering too.
That’s pretty much it! It’s super easy and there are actual noticeable results.
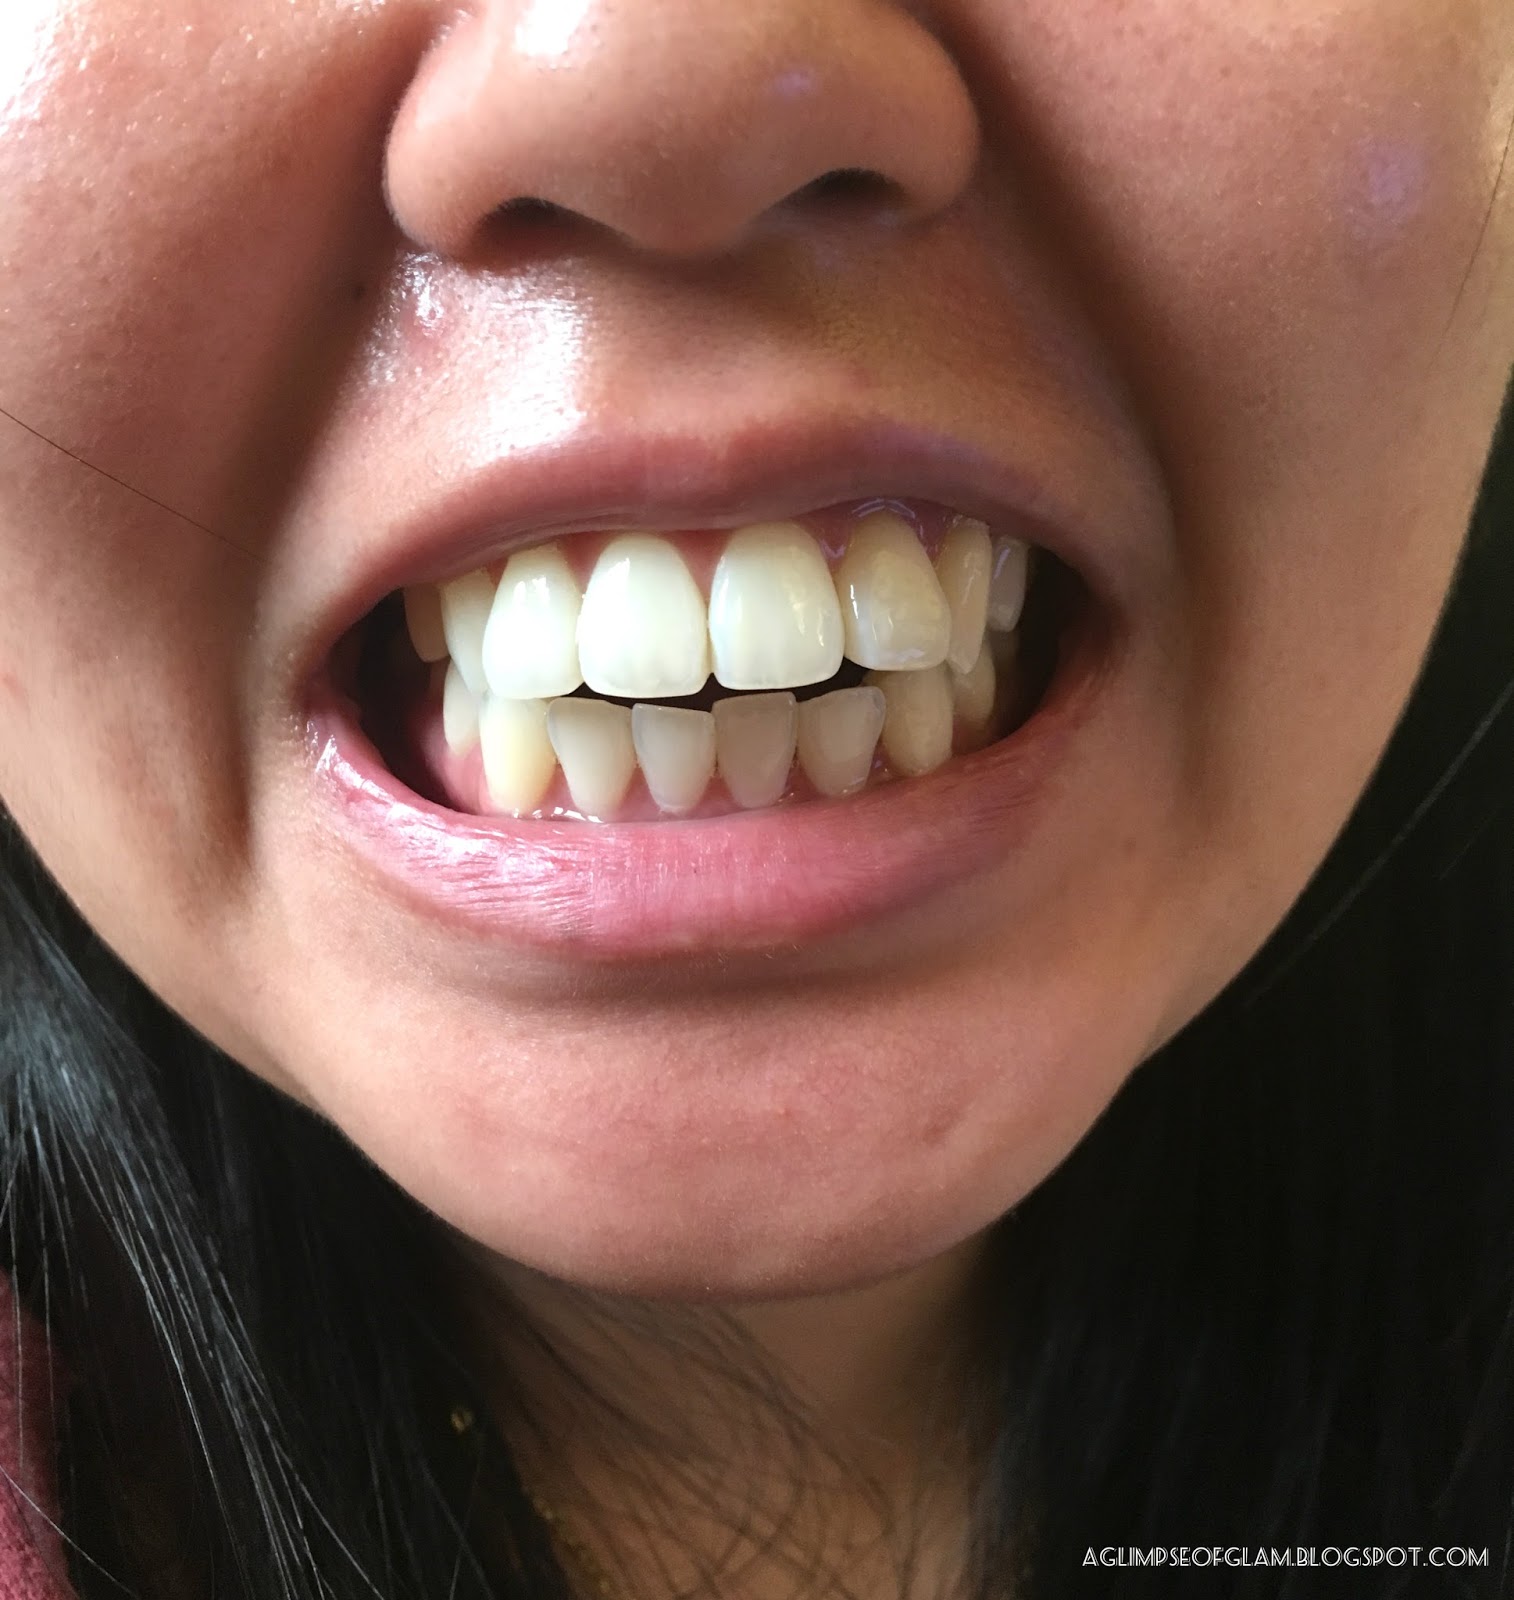
 |
| Before Photo |
Because I had my friend do the treatments, I didn’t see her every single day after every treatment. I saw her for the first several and then the last ones. But there were a couple days here and there that I didn’t see. Despite the desensitizing gel, my friend did experience some sensitivity. Because of that, she ended up skipping a few days, and spreading out her sessions a bit to recover first. HOWEVER, that was easily fixed! She ended up using more desensitizing gel per session, and did not floss prior to the sessions. Flossing can sometimes cut your gums and cause open wounds, which makes your gums and teeth more sensitive to the whitening stuff. But, without flossing before it really helped cut down on the sensitivity. Another tip to reduce teeth sensitivity is to line your gums with Vaseline prior to the treatment, but make sure to not get it on your teeth or else those teeth would be covered and not whitened.
My friend did the treatments for an hour at a time because it can be a bit time consuming. Up to three hours of your mouth being occupied. But even with only one hour sessions, her teeth looked really different from before!
 |
| Results after 1/3 of the treatments (this was when she was consistently doing the treatments every couple days) |
 |
| Results after 2/3 of treatments (she started taking longer pauses between treatments because of the slight sensitivity experienced. But later on with a few adjustments they went away) |
Here’s some feedback from my friend on the overall teeth whitening kit:
I didn’t change anything that she said, only a few grammar bits here and there because I was literally typing it up as she talked. So if there are run-on sentences ignore them. You aren’t an English teacher, and this isn’t a term paper.
Check out the photos to compare the results! She even asked her mom if she saw a difference, and her mom agreed that her teeth did look whiter.
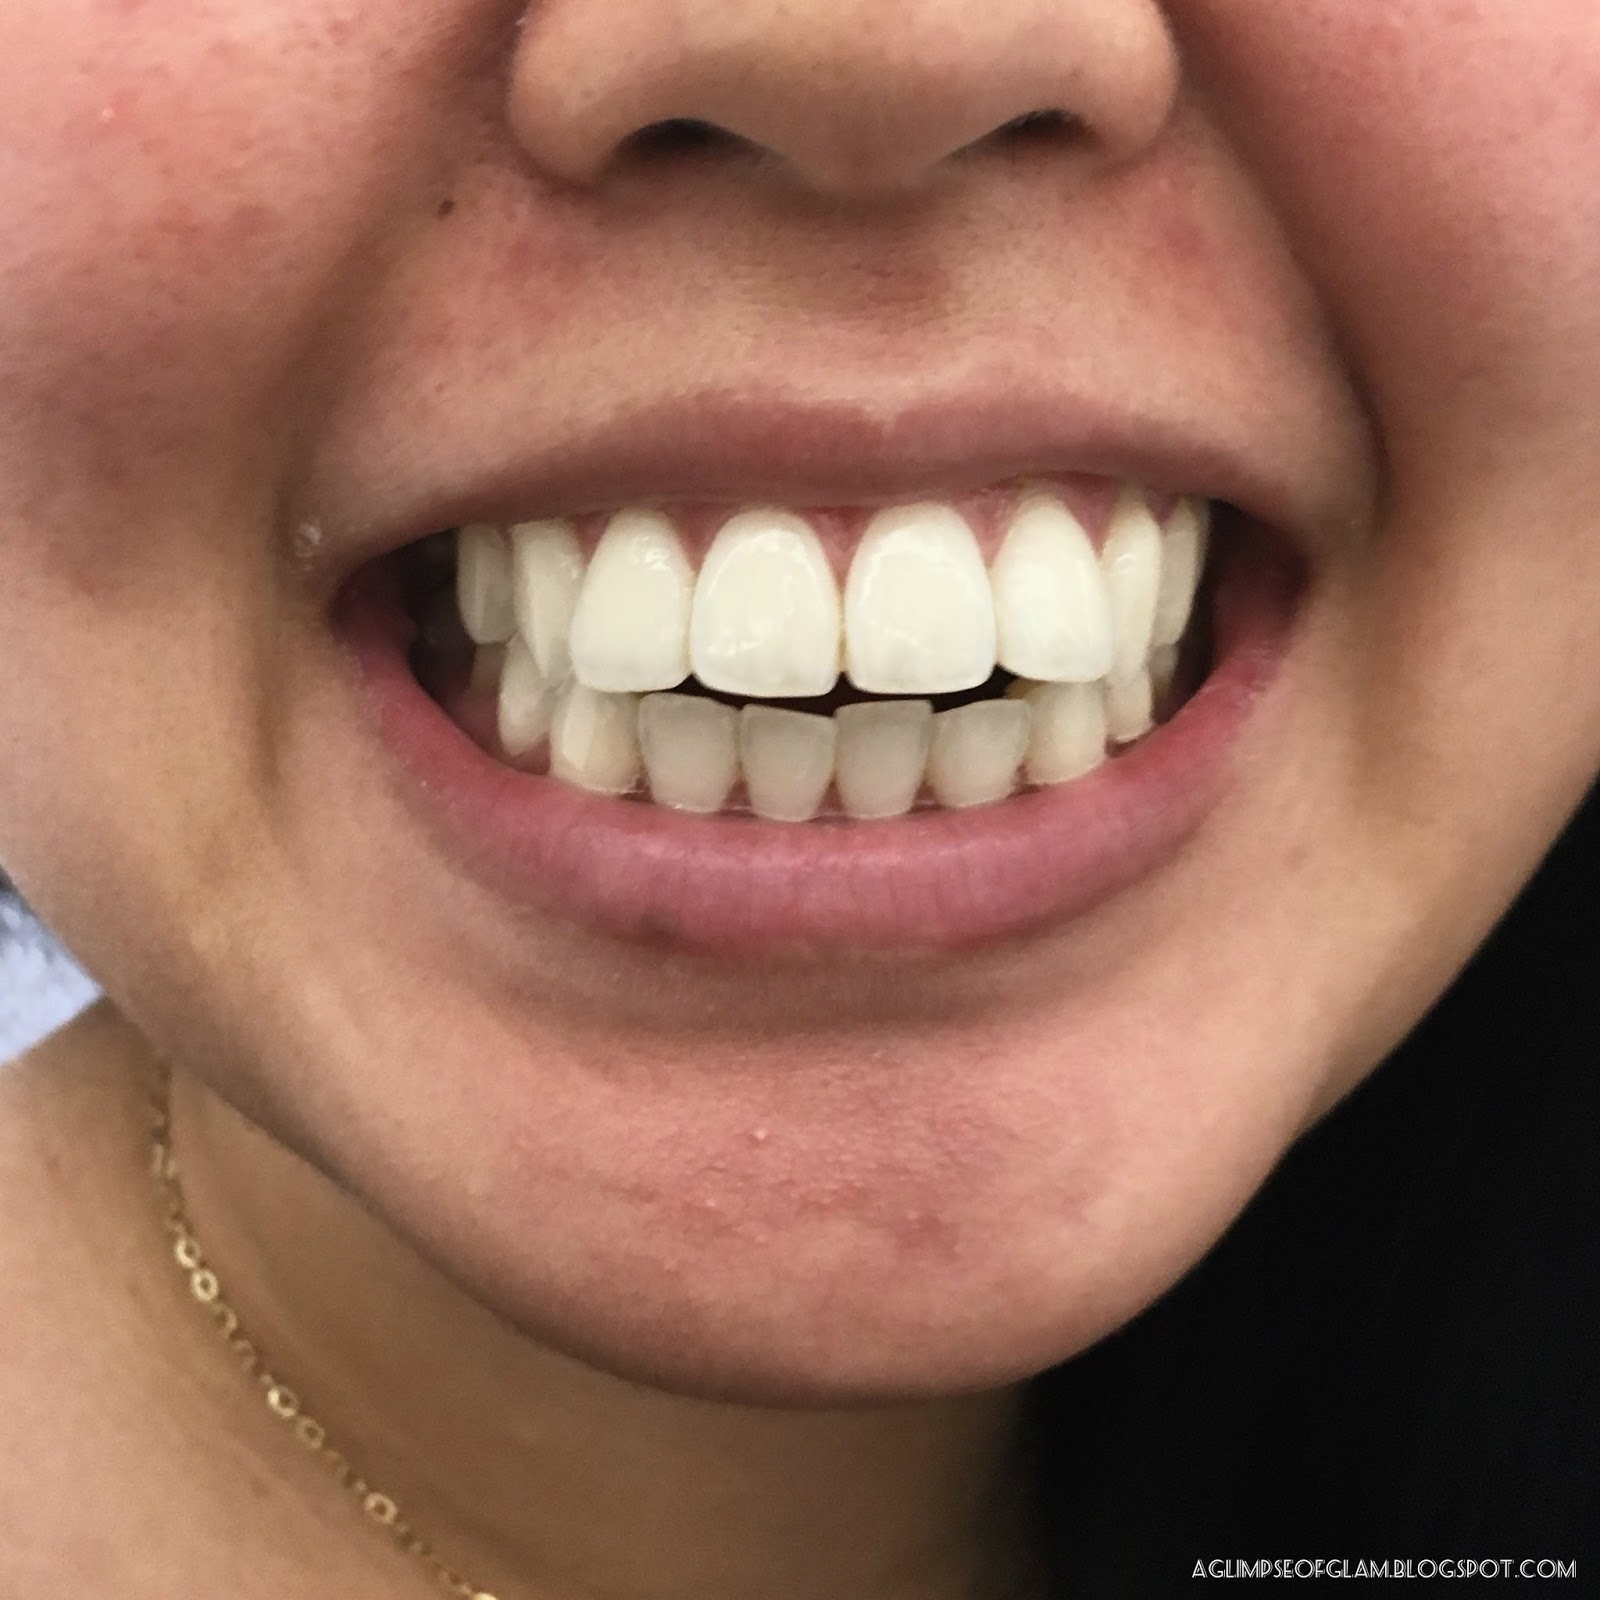
 |
| Final results! Ignore the awkward and weird face here. My friend thought this would help get a better view of her teeth. Like at the dentist. |
 |
| After ALL treatments!! |
After reading the title, this is probably the part you are all waiting for. I HAVE A GIVEAWAY FOR YOU GUYS!! (cue the applause to fill the awkward silence and accompany those jazz hands)
The winner of this Smile Brilliant giveaway will receive $139.95 in credit. This equates to 1 tray creation kit + 6 gel syringes of your choice (meaning like 3 whitening and 3 desensitizing OR 6 whitening)
If you want to enter the giveaway to win this awesome deal so that you can try it out yourself, click on the link below and enter your name and email!
I’ve ALSO got for you a 5% discount coupon code using the code:
Check out the Smile Brilliant website for more information on the teeth whitening trays, or their products in general! Here’s also more information on sensitive teeth, if that’s the one thing holding you back. I have a tendency to experience sensitivity to new products too, so I get that fear. But they’ve actually found some ways to prevent sensitivity; so don’t let that hold you back! Check out more info on teeth sensitivity here!
Here’s a YouTube video as well about someone else’s experience with Smile Brilliant. It might provide more info on how to use the kit, if what I said was a bit confusing. Check it out here!
This is great timing because I bet you will all be or have already been feasting on a bunch of delectable yet teeth staining goodies. So here’s a chance for you all to get your teeth whitened! Now you can go to holiday parties and not worry about your nosy relative asking if you’ve got leftover Halloween makeup on your teeth or if that’s just your teeth looking stained and yellow.
Please do lemme know in the comments below what you thought!! Have you tried out Smile Brilliant before? How do you prevent your teeth from getting stained and yellow?
Don’t forget to enter the giveaway! It closes after TWO WEEKS!!
By the way… I recently made a Twitter so go follow me! You can find me here, or scroll up to the top bar and click on the link too. Just letting you guys know because I’m finally joining in on this social media thing. So yeah…
Thank you very much for reading! I wish you all a fantastic week!!
Til next time,
~A
